

Working comfortably on a train journey with your MacBook means combining the right hardware, accessories, ergonomic habits, and task planning to overcome space, connectivity, and privacy constraints in shared transit spaces. The term professionals use for this practice is “mobile workstation setup,” and it applies whether you’re on Amtrak, Eurostar, or a regional commuter line. The core challenge is predictable: train seats are built for passengers, not workers. With the right gear and approach, you can turn a two-hour ride into a productive, focused work session.
How to work comfortably on a train journey with your MacBook
The first decision that determines your comfort on any train journey is which MacBook you bring. MacBook Air M3 and M5 models offer fanless, silent operation and 9 to 10 hours of real battery life, making them the default choice for most professionals and students traveling light. No fan means no thermal throttling noise in quiet carriages, and no heat buildup on your lap during long sessions.
The MacBook Pro 14 M5 Pro targets a different user. If your work involves video rendering, large Xcode builds, or running local AI models, the Pro’s active cooling and sustained performance under load justify the extra weight. At 3.5 pounds versus the Air’s 2.7 pounds, the difference is noticeable across a full travel day.
| Model | Weight | Battery life | Best for |
|---|---|---|---|
| MacBook Air M3 | 2.7 lbs | 9-10 hours | Writing, browsing, light coding |
| MacBook Air M5 | 2.7 lbs | 10+ hours | All-day travel, students, remote workers |
| MacBook Pro 14 M5 Pro | 3.5 lbs | 11-12 hours | Video, code compilation, heavy processing |
Your workload type is the deciding factor. A journalist filing copy needs the Air. A developer running Docker containers needs the Pro. Matching the machine to the task prevents both underperformance and unnecessary weight in your bag.
Pro Tip: If you travel more than three days per week, the MacBook Air M5 is the correct default. Its battery life covers most full-day routes without requiring a power outlet, removing one variable from your setup entirely.
What accessories do you need for a private, comfortable train workspace?
Accessories determine the quality of your laptop workspace on train more than any single hardware choice. The right combination adds privacy, ergonomic support, and power independence without turning your bag into a carry-on.
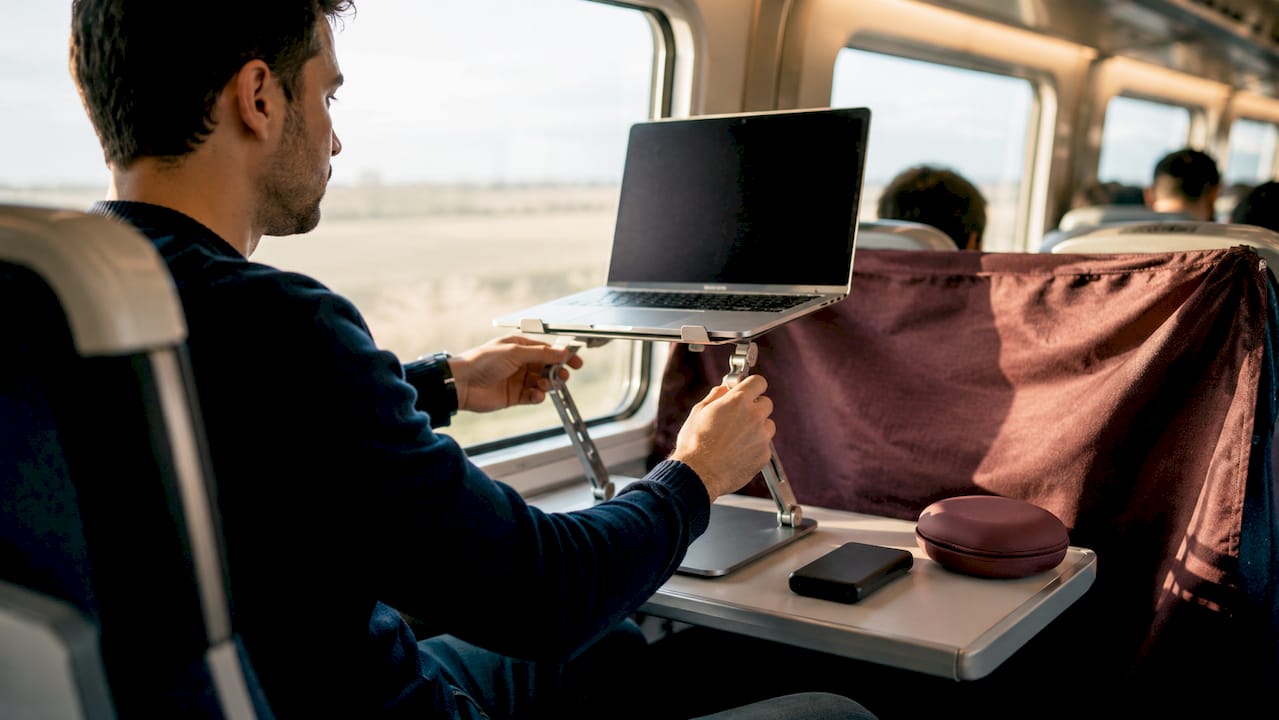
Privacy screens are the most underrated travel accessory for MacBook users. Magnetic privacy screens cost between $49 and $79, add 50 to 65 grams of weight, and restrict side viewing angles to approximately 30 degrees without any battery drain. That means the person in the adjacent seat cannot read your screen, but your direct view remains clear. Clarmuse designs its magnetic privacy screens specifically for MacBook Air and MacBook Pro models, with a clean fit that attaches and detaches in seconds. For anyone handling client data, financial documents, or personal communications in public, this is a non-negotiable addition.
Ergonomic support comes next. Compact laptop stands like the Nexstand K2 and Roost fold flat and raise your screen to eye level, reducing neck strain during sessions longer than 30 minutes. Pair either stand with a compact wireless keyboard such as the Logitech MX Keys Mini, and you have a functional ergonomic setup that fits in a slim compartment of your backpack.
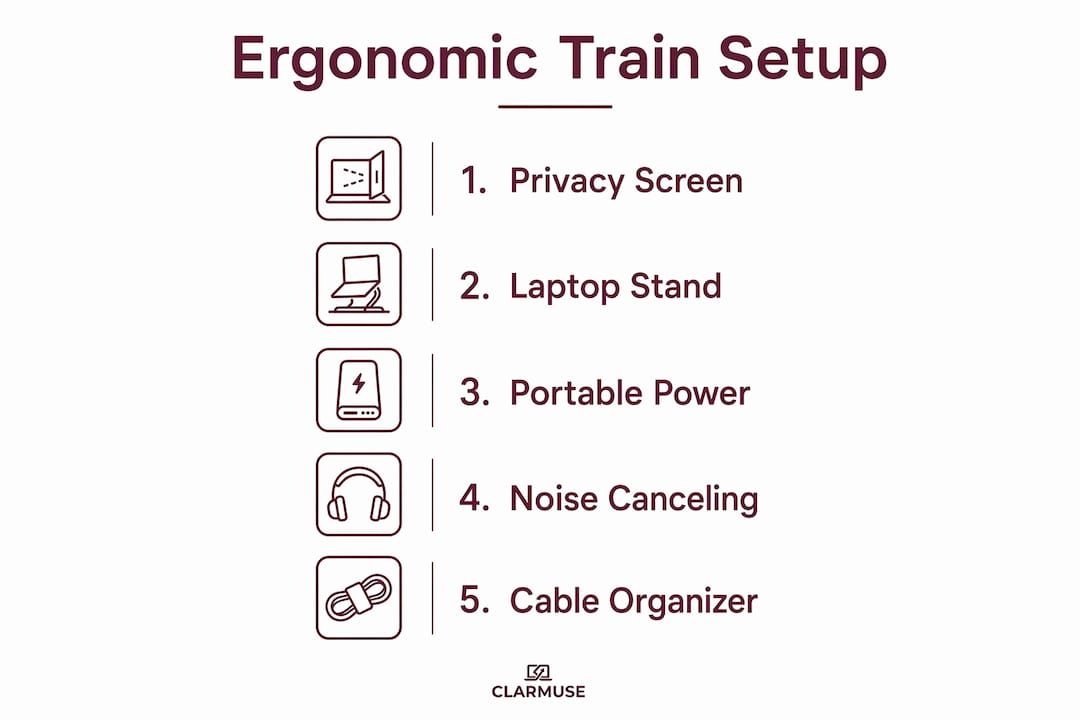
Power management is the third pillar. The Anker 737 PowerCore 24K delivers 140W output and can charge a MacBook Pro fully once or twice on a single bank charge. For a lighter option, the Anker 735 GaNPrime 65W charger weighs 110 grams and handles simultaneous charging of your MacBook, phone, and earbuds from one adapter. Both are worth carrying depending on journey length.
Here is a practical accessory checklist for your comfortable travel work setup:
- Magnetic privacy screen (Clarmuse): protects screen visibility from side angles, model-specific fit
- Compact laptop stand (Nexstand K2 or Roost): raises screen to eye level, folds flat
- Compact wireless keyboard (Logitech MX Keys Mini): reduces wrist strain when using a stand
- High-capacity power bank (Anker 737 PowerCore 24K): 140W, full MacBook charge on the go
- Multi-port travel charger (Anker 735 GaNPrime 65W): 110g, charges three devices simultaneously
- Noise-cancelling headphones (Sony WH-1000XM5 or Apple AirPods Pro): blocks carriage noise for focus
- Slim cable organizer: keeps USB-C cables and adapters accessible without bag clutter
Pro Tip: Pack your privacy screen and power bank in the outer pocket of your bag, not buried inside. Boarding a train with 90 seconds to spare is not the moment to dig through your gear.
How do you set up an ergonomic MacBook workspace on a train?
Train seats and public transit furniture are designed for waiting, not prolonged work. The biggest ergonomic challenge is the absence of adjustable seating. You can address this with a structured setup process that takes under three minutes to deploy.
Follow this sequence when you board:
- Claim a table seat or window seat with a tray table if available. Window seats reduce the number of people who can see your screen from the side.
- Place your laptop stand on the tray table and set your MacBook on it before opening any apps. Screen at eye level prevents the forward head posture that causes neck pain after 45 minutes.
- Connect your wireless keyboard and position it so your elbows rest at roughly 90 degrees. If the tray is too low, place your bag on your lap as a makeshift riser.
- Attach your privacy screen before opening sensitive documents. The magnetic attachment on Clarmuse screens takes under five seconds.
- Put on noise-cancelling headphones and activate Do Not Disturb on macOS before starting work. This blocks both audio and notification interruptions.
- Check your power situation. If the carriage has outlets, plug in your charger. If not, connect your power bank now rather than waiting until your battery hits 20%.
Ambient temperature in train carriages can shift rapidly between stations and tunnels. Packing a light layer such as a cardigan or thin zip-up prevents the distraction of temperature discomfort during a two-hour session.
For connectivity, treat onboard Wi-Fi as a bonus rather than a dependency. Train Wi-Fi has consistent coverage gaps, particularly in tunnels and rural stretches. A personal mobile hotspot from your phone gives you a reliable fallback. Enable offline modes in Google Docs, Notion, and Slack before boarding so you can continue working through dead zones without interruption.
Pro Tip: On macOS, go to System Settings and set your iPhone as a Personal Hotspot with Auto-Join enabled. Your MacBook connects automatically when train Wi-Fi drops, with no manual switching required.
What tasks should you prioritize when working on a train?
Treating a train journey as a full-output work session sets unrealistic expectations. Transit days work best as asynchronous task days, reserved for writing, reviewing, planning, and editing rather than live calls, collaborative sprints, or deadline-critical deliverables.
The most productive train workers pre-load their sessions before boarding. Queue any file uploads, sync your Notion workspace for offline access, download the documents you need to review, and set your email client to work offline. This preparation removes the dependency on connectivity entirely for the first hour of your journey.
Apps that support this workflow well include Notion with offline sync enabled, Google Docs in offline mode via Chrome, Bear or Obsidian for writing without cloud dependency, and Ulysses for long-form drafting. Each of these tools stores your work locally and syncs when connectivity returns.
“Treat onboard Wi-Fi as a bonus; prepare offline files and enable offline modes before boarding to prevent frustration.” — Tour Daufuskie Journal
Plan micro-breaks every 45 to 50 minutes. Stand in the vestibule between carriages for two minutes, roll your shoulders, and decompress your spine. This is not optional comfort advice. Sustained static posture in a cramped seat accelerates fatigue faster than the work itself. Protecting your physical energy protects your output quality for the rest of the day after you arrive.
Set a realistic output goal before you board. One polished draft, three reviewed documents, or a completed project outline is a strong target for a two-hour journey. Matching your goal to the conditions prevents the frustration of measuring a transit session against a desk session.
Key takeaways
Working comfortably on a MacBook during a train journey requires the right model, a small set of targeted accessories, an ergonomic setup routine, and tasks matched to transit conditions.
| Point | Details |
|---|---|
| Choose the right MacBook | MacBook Air M5 covers most travel needs; MacBook Pro 14 M5 Pro suits heavy processing workloads. |
| Add a privacy screen | Magnetic privacy screens cost $49 to $79, add minimal weight, and protect screen visibility from side angles. |
| Build an ergonomic setup | A compact stand, wireless keyboard, and lumbar support reduce strain during sessions over 30 minutes. |
| Manage connectivity proactively | Use a personal mobile hotspot and enable offline modes in Notion and Google Docs before boarding. |
| Plan asynchronous tasks | Reserve train time for writing, reviewing, and planning rather than live calls or real-time collaboration. |
What working on trains actually taught me about mobile setups
I spent two years treating every train journey as a full desk replacement. The result was consistent frustration: dropped calls mid-meeting, neck pain by the time I arrived, and the low-grade anxiety of working on sensitive documents in a crowded carriage without any screen protection.
The shift came when I stopped optimizing for maximum output and started optimizing for sustainable, distraction-free work. The MacBook Air M3 replaced my Pro for travel days. A Clarmuse privacy screen went on before I opened anything client-facing. A Nexstand K2 stand became a permanent fixture in my bag, not an optional extra.
The counterintuitive lesson: the lighter and simpler your setup, the more you actually get done. Every accessory that requires setup time or mental overhead is a tax on your focus. A magnetic privacy screen that attaches in five seconds gets used every time. A bulky filter that requires careful alignment gets left in the bag.
The ergonomic piece is the one most professionals skip until they have a problem. Supplemental lumbar support and portable stands are not luxury items for train work. They are the difference between arriving at your destination ready to continue working and arriving stiff and distracted. The Roost stand in particular folds to the size of a pen and adds nothing meaningful to bag weight.
My honest recommendation: build your travel kit once, keep it packed, and stop making decisions about it at the station. The professionals who work best on trains are the ones who board with a system, not a plan.
— Gabriel
Protect your screen and your focus with Clarmuse
Clarmuse designs magnetic privacy screens built specifically for MacBook Air and MacBook Pro models, with a fit that attaches in seconds and removes just as fast. Each screen restricts side viewing angles to approximately 30 degrees, keeping your work visible to you and invisible to the person in the next seat.
Whether you’re on a commuter train, in an airport lounge, or working from a café, the MacBook Pro privacy screen from Clarmuse adds a layer of control without adding bulk or complexity to your setup. For MacBook Pro 14 users specifically, the magnetic privacy filter for MacBook Pro 14.2" is precision-cut for a clean, model-specific fit. Browse the full range and find the right screen for your MacBook at Clarmuse.
FAQ
Which MacBook is best for traveling and working on trains?
The MacBook Air M5 is the best MacBook for traveling due to its fanless design, 2.7-pound weight, and 10-plus hours of real battery life. The MacBook Pro 14 M5 Pro is the better choice only if your work requires sustained heavy processing such as video rendering or large code compilation.
Do privacy screens affect MacBook display quality?
Magnetic privacy screens reduce side viewing angles to approximately 30 degrees but do not affect the direct viewing experience for the user. Quality screens in the $49 to $79 range add no measurable battery drain and weigh between 50 and 65 grams.
How do you handle connectivity when working on a train?
Use your phone as a personal mobile hotspot and treat onboard train Wi-Fi as unreliable. Enable offline modes in apps like Notion, Google Docs, and Slack before boarding to maintain productivity through coverage gaps.
What ergonomic accessories are worth carrying for train work?
Compact laptop stands like the Nexstand K2 or Roost raise your screen to eye level and fold flat for easy packing. Pair either with a compact wireless keyboard to reduce neck and wrist strain during sessions longer than 30 minutes.
What types of work are best suited for train journeys?
Asynchronous tasks such as writing, editing, reviewing documents, and planning are best suited for train travel. Live calls, real-time collaboration, and deadline-critical deliverables are better scheduled for stable desk environments.


