

MacBook overheating is defined as the device exceeding Apple’s recommended operating temperature range, triggering thermal throttling that cuts processing speed and shortens battery life. The right accessories can prevent this entirely. Passive aluminum stands, active cooling pads, and proper cable management are the three categories that deliver the most measurable results. Choosing the wrong accessory, such as a thick plastic case, can make heat problems worse. This guide covers what works, what doesn’t, and how to build a setup that keeps your MacBook running at full speed.
Which accessories effectively prevent MacBook overheating?
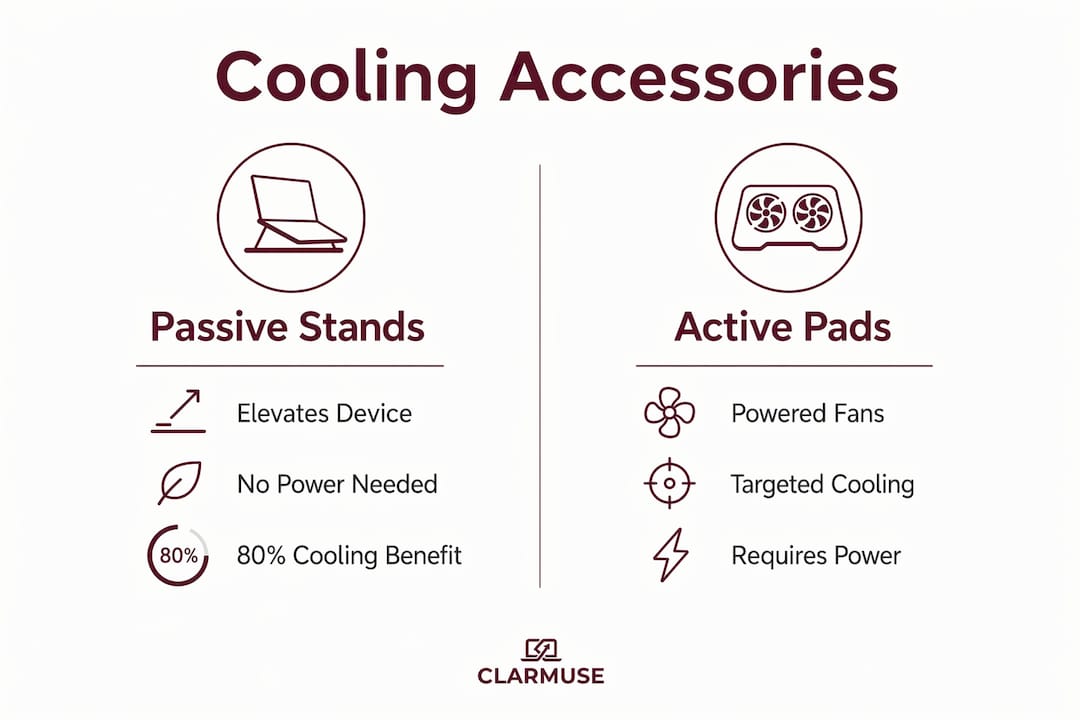
The single most effective accessory for MacBook heat reduction is a passive aluminum stand. MacBook’s unibody aluminum chassis is designed to radiate heat through its body rather than through bottom intake vents. Elevating the machine lets cool air circulate underneath and allows the chassis to shed heat naturally through convection. Passive elevation alone provides approximately 80% of the cooling benefit compared to powered cooling pads. That figure matters because it means most users get nearly all the thermal benefit they need without spending money on a fan-based pad.
Passive aluminum stands
A good aluminum stand lifts the rear of your MacBook 20–30mm off the desk. That gap is enough to create meaningful airflow underneath the chassis. Aluminum also conducts heat away from the base of the machine, adding a secondary dissipation path. Elevation alone yields 4–7°C lower chassis temperatures) under sustained load with no power consumption. For most users doing video calls, writing, or light photo editing, a passive stand is the only cooling accessory they need.

Active cooling pads
Active cooling pads use powered fans to push air across the bottom of the MacBook. They can reduce chassis temperatures by 5–15°C during intensive tasks, but only when the fan placement actually aligns with your MacBook’s vent locations. Most generic pads do not align correctly. Before buying any active pad, verify fan placement) matches your specific MacBook model’s airflow design. If alignment is off, the pad adds noise and power draw without reducing temperature.
Cases and skins: the hidden heat trap
Thick plastic or vinyl MacBook cases insulate the aluminum body and trap heat inside the chassis. The aluminum shell is a key part of the thermal design. Cover it with an insulating material and you block the primary heat dissipation path. Thin fabric sleeves used only for transport are fine. Rigid plastic snap-on cases worn during use are not. Remove the case when running any sustained workload.
Pro Tip: Test a simple book or two stacked under your MacBook’s rear before buying any cooling accessory. If temperatures drop noticeably, a passive aluminum stand will solve your problem for under $30.
How to set up your MacBook and accessories for optimal cooling
Correct setup matters as much as the accessory itself. A quality stand placed on a soft surface still underperforms because the soft material blocks airflow under the stand’s feet. Follow these steps to get the most from your cooling setup.
- Place the stand on a hard, flat surface. Wood, glass, or metal desks work well. Fabric, carpet, and cushions restrict airflow and trap heat under the stand.
- Lift the rear 20–30mm. This angle improves both airflow and typing ergonomics. Most quality aluminum stands hit this range by default.
- Keep the front vent area clear. Do not stack papers or accessories directly in front of the MacBook’s keyboard edge, where warm air exits.
- Manage your cables. Route power and peripheral cables away from the MacBook’s sides. Bundled cables near the chassis create localized heat pockets.
- Charge separately from heavy tasks when possible. Charging while running intensive workloads generates extra heat that stresses the cooling system. Charge fully while idle, then run demanding tasks on battery for better thermal stability.
Pro Tip: If you use an external monitor, position it so the MacBook’s lid stays open at a natural angle. A fully closed clamshell setup blocks the keyboard area’s passive heat exit path and requires active cooling to compensate.
The table below shows the most common setup mistakes and their fixes.
| Setup mistake | Correct approach |
|---|---|
| MacBook on a bed or couch | Use a hard, flat desk surface only |
| Rear lift under 10mm | Use a stand that raises rear 20–30mm |
| Charging during video rendering | Charge idle, run heavy tasks on battery |
| Cables bundled against chassis | Route cables away from the MacBook body |
| Snap-on plastic case during use | Remove case for any sustained workload |
What maintenance and environment habits reduce MacBook heat?
Accessories handle the hardware side of thermal management for laptops. Environment and maintenance handle everything else. Both are required for consistent results.
Apple’s official guidelines recommend operating MacBooks between 50° and 95°F with humidity between 0% and 95%. Working in a hot room or in direct sunlight pushes ambient temperature above this range before the MacBook even starts a task. Move to a cooler space or use air conditioning when ambient temperature exceeds 85°F during heavy use.
Dust buildup inside the vents is one of the most overlooked causes of overheating. Blocked vents reduce thermal performance significantly over time. Use a can of compressed air every three to six months to clear dust from the vent slots. Point the nozzle at an angle rather than straight in to avoid pushing debris deeper into the chassis.
Software habits affect temperature as much as physical setup. Background processes, browser tabs, and poorly coded apps can push CPU usage to 80–100% while the screen shows nothing demanding. Closing resource-heavy apps and monitoring CPU load through Activity Monitor is a key part of temperature control that most users skip entirely. Keep macOS updated, since Apple regularly ships thermal management improvements in point releases.
- Check Activity Monitor for processes using over 30% CPU when the MacBook feels warm
- Close unused browser tabs, which each consume RAM and CPU cycles
- Disable unnecessary login items that run silently in the background
- Install macOS updates promptly for the latest thermal management patches
- Avoid direct sunlight on the MacBook’s aluminum body during use
How does your MacBook model affect which cooling accessories you need?
MacBook thermal architecture varies by model), and that difference directly affects which accessories deliver results. MacBook Air models use a fanless design on older silicon and rely entirely on passive heat dissipation. MacBook Pro models include internal fans that activate under load. This distinction changes the accessory calculus.
For MacBook Air users, a passive aluminum stand is the primary tool. The Air’s fanless design means no active cooling pad can assist internal airflow because there is no internal fan to supplement. Elevation and a cool ambient environment are the two levers available. For MacBook Pro users running sustained workloads like video encoding, 3D rendering, or large dataset processing, an active cooling pad with correct vent alignment adds meaningful benefit on top of elevation.
Casual users on either model, those doing writing, email, web browsing, and video calls, get full benefit from a passive stand alone. The 5–15°C reduction from active pads only matters when the CPU is under sustained heavy load for extended periods. Buying an active pad for light use is unnecessary spending.
| MacBook type | Typical workload | Best accessory approach |
|---|---|---|
| MacBook Air (fanless) | Light to moderate use | Passive aluminum stand, cool environment |
| MacBook Air (fanless) | Sustained heavy tasks | Passive stand plus software management |
| MacBook Pro | Light to moderate use | Passive aluminum stand |
| MacBook Pro | Sustained heavy tasks | Passive stand plus aligned active cooling pad |
For students building out a full desk setup, the MacBook study accessories guide covers how cooling stands fit alongside other productivity tools. Users working in shared spaces will find additional context in the MacBook accessories for shared spaces overview.
Key Takeaways
Passive aluminum stands deliver the majority of MacBook cooling benefit and should be the first accessory every user adds before considering powered alternatives.
| Point | Details |
|---|---|
| Passive stands first | Elevation provides ~80% of cooling benefit with no power cost or noise. |
| Active pads require alignment | Verify fan placement matches your MacBook’s vents before purchasing any powered pad. |
| Cases trap heat | Remove snap-on plastic cases during any sustained workload to preserve chassis heat radiation. |
| Environment matters | Apple recommends 50°–95°F ambient temperature; exceeding this range negates accessory benefits. |
| Software is part of the fix | Closing high-CPU background apps reduces thermal load as effectively as some hardware accessories. |
What I’ve learned after years of watching MacBooks overheat
The most common mistake I see is users buying an active cooling pad as their first move. They spend $40–80 on a fan-based pad, plug it in, and notice almost no change. That’s because the pad’s fans don’t align with the MacBook’s actual airflow design, or the user has a MacBook Air with no internal fans to supplement. The pad runs, makes noise, and does very little.
The second mistake is keeping a snap-on plastic case on during heavy use. The case feels protective, and it is, for drops and scratches. But it wraps the aluminum chassis in an insulating layer and blocks the primary heat exit path. I’ve seen MacBooks running 10–15°C hotter with a case on than without one during the same task. Take the case off when you sit down to work.
What actually works is boring but consistent: a quality aluminum stand, a hard flat surface, a cool room, and clean vents. Add software monitoring through Activity Monitor and keep macOS current. That combination handles the thermal needs of 90% of MacBook users without any powered accessories at all. Active cooling pads are a real tool for power users doing sustained rendering or compilation work, but they belong at the end of the decision process, not the beginning.
— Gabriel
Clarmuse accessories that complement your MacBook setup
MacBook protection goes beyond temperature. When you work in cafés, libraries, airports, or coworking spaces, screen privacy becomes as important as keeping the device cool.

Clarmuse makes magnetic privacy screen protectors designed specifically for MacBook Air and MacBook Pro models. The magnetic attachment system means the filter goes on and comes off in seconds, with no adhesive residue and no interference with the aluminum chassis’s ability to radiate heat. Unlike rigid snap-on cases, Clarmuse privacy screens cover only the display, leaving the body and vents fully exposed. Browse the full range of MacBook Pro privacy screens or go straight to the MacBook Air 13.6" privacy screen to find your model.
FAQ
What is the best cooling accessory for a MacBook?
A passive aluminum stand is the best first accessory for most MacBook users. Elevation alone provides approximately 80% of the cooling benefit compared to powered pads, with no noise or power draw.
Do cooling pads actually work with MacBooks?
Active cooling pads work only when their fan placement aligns with the MacBook’s vent locations. Most generic pads do not align correctly, making elevation a more reliable starting point.
Can a MacBook case cause overheating?
Yes. Thick plastic or vinyl snap-on cases insulate the aluminum chassis and block its primary heat dissipation path, raising internal temperatures during sustained tasks.
What temperature should my MacBook operate in?
Apple recommends an ambient operating range of 50°–95°F (10°–35°C) with humidity between 0% and 95%. Exceeding this range increases the risk of thermal throttling.
Does software affect MacBook temperature?
Closing resource-heavy background apps and monitoring CPU usage through Activity Monitor can reduce MacBook temperature as effectively as some hardware accessories, making software management a core part of any thermal strategy.


