
Privacy filters are physical overlays that narrow your screen’s visible angle to block side views, and screen clarity is what determines whether that protection is actually usable. Without adequate clarity, a privacy filter trades one problem for another: you stop strangers from reading your screen, but you can barely read it yourself. The balance between privacy and legibility is the core challenge every shared-workspace user faces. Brands like 3M pioneered this category, and modern micro-louver technology has made that balance far more achievable than early filters allowed.
Why screen clarity matters with privacy filters
Privacy filters work by embedding a micro-louver layer inside the screen overlay. Think of it like a venetian blind at a microscopic scale. Light travels straight through to your eyes but gets blocked at angles beyond a narrow cone. Modern privacy screens reduce viewing angles from 170° to under 60°, making content illegible outside that direct view. That is a dramatic reduction, and it is exactly what protects your data in a café or airport lounge.
The trade-off is real but manageable. Visual contrast ratio can drop to near 1:1 outside the direct viewing cone. From your seat, contrast stays intact. From the side, the screen goes dark. The challenge is that even front-facing users can notice a slight reduction in brightness or perceived sharpness, especially on older or lower-quality filters.
Early privacy filters had a reputation for graininess and moiré patterns. Those complaints were valid in the 2000s. Today, precision micro-louver alignment has largely solved both issues by matching the louver grid to the pixel grid. The result is a cleaner image with minimal interference. Anti-reflective and anti-glare coatings on modern filters further reduce eye fatigue during long sessions.
Here is what actually affects your front-facing clarity with a privacy filter applied:
- Louver density and alignment: Higher precision means less visible grain.
- Filter thickness: Thinner filters sit closer to the display surface and produce sharper images.
- Coating quality: Anti-glare coatings reduce reflections without washing out colors.
- Brightness compensation: Privacy filters reduce overall brightness, so display settings matter.
- Fit accuracy: A filter sized for your exact screen model eliminates edge distortion.
Pro Tip: Increase your MacBook’s display brightness by 20–30% after applying a privacy filter to restore perceived clarity without straining your eyes.
Does screen size or resolution actually drive clarity?
Screen clarity depends more on pixel density and font legibility than on screen size or resolution alone. A 4K display running at the wrong scaling setting is harder to read than a well-calibrated 1080p panel. When you add a privacy filter on top, those calibration decisions matter even more.
Brightness, contrast, and text rendering quality matter more than raw specs for readability over prolonged periods. Optimized font legibility reduces fatigue and improves work accuracy. That finding reframes how you should evaluate privacy filters. The question is not just “how much does it dim my screen?” It is “does my display stay legible for four hours of document work?”
High refresh rates and high resolutions do not guarantee a better reading experience under a privacy filter. A 120Hz MacBook Pro display with a poorly fitted filter will still produce visible grain and color shift. Proper display calibration, including brightness, contrast, and color temperature, preserves clarity under the filter far better than raw specs do.
| Clarity Factor | Impact Without Filter | Impact With Privacy Filter |
|---|---|---|
| Pixel density | High clarity at normal brightness | Maintained if filter is well-aligned |
| Brightness level | Default settings work well | Needs 20–30% increase to compensate |
| Contrast calibration | Standard settings sufficient | Critical for text legibility |
| Font rendering | Smooth at native resolution | Slightly softened by filter layer |
| Anti-glare coating | Optional comfort feature | Reduces compounded reflections |
Pro Tip: On a MacBook, go to System Settings > Displays and enable “True Tone” alongside a brightness boost. This keeps color balance natural even with a privacy filter applied.
Experts emphasize that maintaining brightness and contrast calibration is the most practical step to preserve productivity and prevent eye strain when using privacy filters. That advice applies directly to MacBook users working in variable lighting conditions across coworking spaces, libraries, and hotel lounges.
Adhesive vs. magnetic: which filter preserves clarity better?
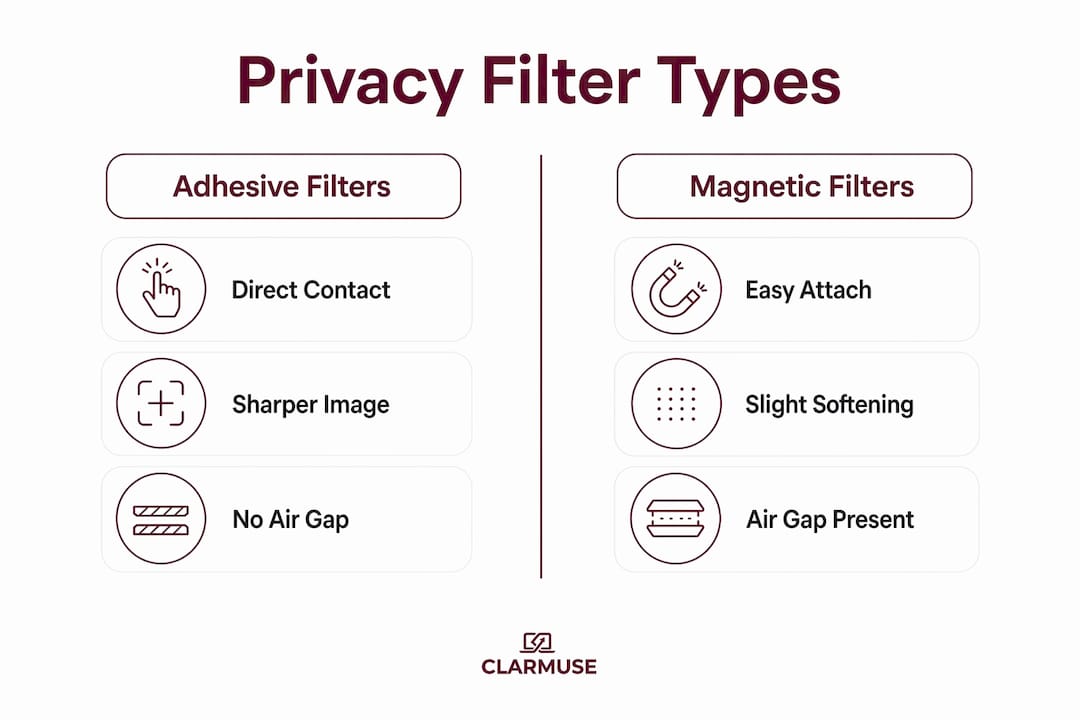
Privacy filters fall into two main attachment categories: adhesive and magnetic. Each affects clarity and daily usability in different ways.
Adhesive filters press directly against the screen surface. That tight contact minimizes the air gap between the filter and the display, which reduces light scatter and produces sharper images. The trade-off is removal. Adhesive filters are difficult to take off cleanly, and repeated removal risks residue or screen damage.
Magnetic filters attach via small magnets embedded in the frame. They are thicker than adhesive versions and may prevent laptop lids from closing tightly, though this is generally safe for the hardware. The slight air gap between a magnetic filter and the screen can introduce minor softness at close reading distances. For most users working at a normal arm’s length, this difference is not noticeable.
The privacy direction also varies by filter type:
- Two-way privacy filters block side views from the left and right. They are the most common option and the least disruptive to front-facing clarity.
- Four-way privacy filters block views from all four edges, including above and below. They offer stronger protection but reduce overall brightness more significantly.
For MacBook users in shared spaces, magnetic filters offer a practical advantage. You can remove the filter when working alone and reattach it in seconds when moving to a café or open office. That flexibility means you are not permanently accepting any clarity trade-off.
Additional coating features worth comparing:
- Blue light filtering: Reduces high-energy light that contributes to eye fatigue during long screen sessions.
- Anti-glare coating: Diffuses ambient light reflections, particularly useful in brightly lit offices or near windows.
- Matte finish: Matte finished privacy screens reduce smudging and glare, improving comfort during long work sessions by minimizing fingerprints that obscure the display.
How to maximize clarity while keeping your screen private
Getting the most out of a privacy filter in a shared workspace comes down to setup and maintenance. These steps apply directly to MacBook users in public environments.
- Position the filter flush with the screen. Any gap or misalignment introduces distortion at the edges. A model-specific filter eliminates this problem entirely.
- Boost display brightness after applying the filter. All privacy filters reduce screen brightness to some degree. Compensate directly in display settings rather than straining to read a dim screen.
- Sit within the optimal viewing cone. Privacy filters are designed for a specific front-facing angle. Leaning too far to one side puts you outside the clear zone.
- Clean the filter surface regularly. Dust and smudges accumulate on the outer coating and reduce perceived sharpness. A microfiber cloth removes most buildup without scratching.
- Use a matte finish filter in bright environments. Glossy filters reflect overhead lighting and window glare, compounding the brightness reduction from the louver layer.
- Remove the filter when working alone. If you are at home or in a private office, removing a magnetic filter restores full display performance without any trade-off.
Visual hacking attacks happen in under 5 seconds in public spaces like airports or trains. That speed means passive protection matters more than active awareness. A properly fitted privacy filter with good clarity lets you work without constantly checking who is nearby. You get the privacy screen benefits without the cognitive overhead of managing your screen angle manually.
Pro Tip: If you work near a window, position your MacBook so the screen faces away from the light source. This reduces glare on the filter surface and keeps your display readable without cranking brightness to maximum.
Key takeaways
Screen clarity and privacy protection are not competing goals. The right filter, properly fitted and calibrated, delivers both.
| Point | Details |
|---|---|
| Micro-louver technology works | Modern filters narrow viewing angles to under 60° without significant front-facing clarity loss. |
| Calibration matters more than specs | Adjusting brightness and contrast after applying a filter preserves legibility better than buying a higher-resolution display. |
| Magnetic filters offer practical flexibility | Removable magnetic filters let you restore full display quality when privacy is not needed. |
| Matte coatings reduce compounded glare | Anti-glare and matte finishes offset the brightness reduction that all privacy filters introduce. |
| Fit accuracy drives clarity | A model-specific filter eliminates edge distortion and air gaps that degrade image sharpness. |
What i have learned about clarity and privacy filters
Most people who complain about privacy filters are using the wrong one. They bought a universal size, applied it slightly crooked, and never adjusted their display brightness. Then they concluded that privacy filters ruin screen quality. That conclusion is wrong, but it is understandable.
The real issue is that clarity and privacy are treated as separate concerns when they are actually the same concern. A filter that makes your screen hard to read is not protecting you. You will tilt the screen, squint, or remove the filter entirely. At that point, you have neither privacy nor comfort.
What I have found is that screen filters upgrade MacBook privacy and comfort most effectively when the fit is exact and the display is recalibrated after application. The technology is good enough today that clarity should not be a reason to avoid privacy filters. It should be a reason to choose a better one.
The users who get the most out of privacy filters are not the most security-conscious. They are the most practical. They pick a filter designed for their exact device, spend two minutes adjusting brightness, and then forget the filter is there. That is the goal.
— Gabriel
Privacy without the clarity trade-off: Clarmuse for MacBook
Clarmuse builds magnetic privacy screen protectors designed specifically for MacBook Air and MacBook Pro models. Each filter is sized for an exact screen model, which eliminates the edge distortion and air gaps that generic filters introduce.
Clarmuse filters attach magnetically in seconds and remove just as fast, so you get full privacy in a café and full display performance at home. The filters include blue light filtering and anti-glare coatings to offset the brightness reduction that comes with any louver-based screen. If you use a MacBook Pro 16.2" or a MacBook Air 15.3", Clarmuse has a model-specific fit ready. Browse the full MacBook Pro privacy filter collection to find your size.
FAQ
What does a privacy filter actually do to screen clarity?
A privacy filter reduces viewing angles from roughly 170° to under 60°, which slightly dims the front-facing display. Adjusting display brightness and contrast after application restores most of the perceived clarity.
Are magnetic privacy filters as clear as adhesive ones?
Magnetic filters introduce a small air gap that can soften the image slightly compared to adhesive filters. For most users at normal reading distance, this difference is not noticeable in daily use.
Why does my privacy filter look grainy?
Graininess typically comes from a poor fit or a low-precision louver grid. Modern filters with high-precision micro-louver alignment have largely eliminated this issue. A model-specific filter resolves most grain complaints.
Do privacy filters work in bright sunlight?
Privacy filters reduce overall screen brightness, which makes direct sunlight harder to manage. Maximizing display brightness and using a matte finish filter reduces this limitation significantly.
How do i know if my privacy filter fits correctly?
A correctly fitted filter sits flush against the screen with no visible gaps at the edges and no overhang. Model-specific filters, like those from Clarmuse, are sized to exact MacBook dimensions to remove guesswork from the fit.


