

Airport Wi-Fi carries two distinct threat categories: network attacks (fake hotspots, captive-portal phishing, DNS hijacking) and physical observation (shoulder surfing). The fastest defense against both is a magnetic privacy screen on your MacBook plus basic network hygiene before you connect. A VPN addresses network-level interception but does nothing to stop someone reading your screen from the next seat. That gap is where physical screen privacy matters most.
Key risks at a glance:
- Fake hotspots (evil twin attacks): A rogue network mimics the airport’s official SSID to intercept your traffic.
- Captive-portal phishing: A convincing login page harvests your credentials or pushes malware.
- Shoulder surfing: A bystander visually captures passwords, documents, or sensitive data directly from your screen.
- DNS hijacking: Your web requests are silently redirected to malicious destinations.
Table of Contents
- What network threats actually matter on airport Wi-Fi in 2026
- Why shoulder surfing is the most underestimated risk for MacBook users
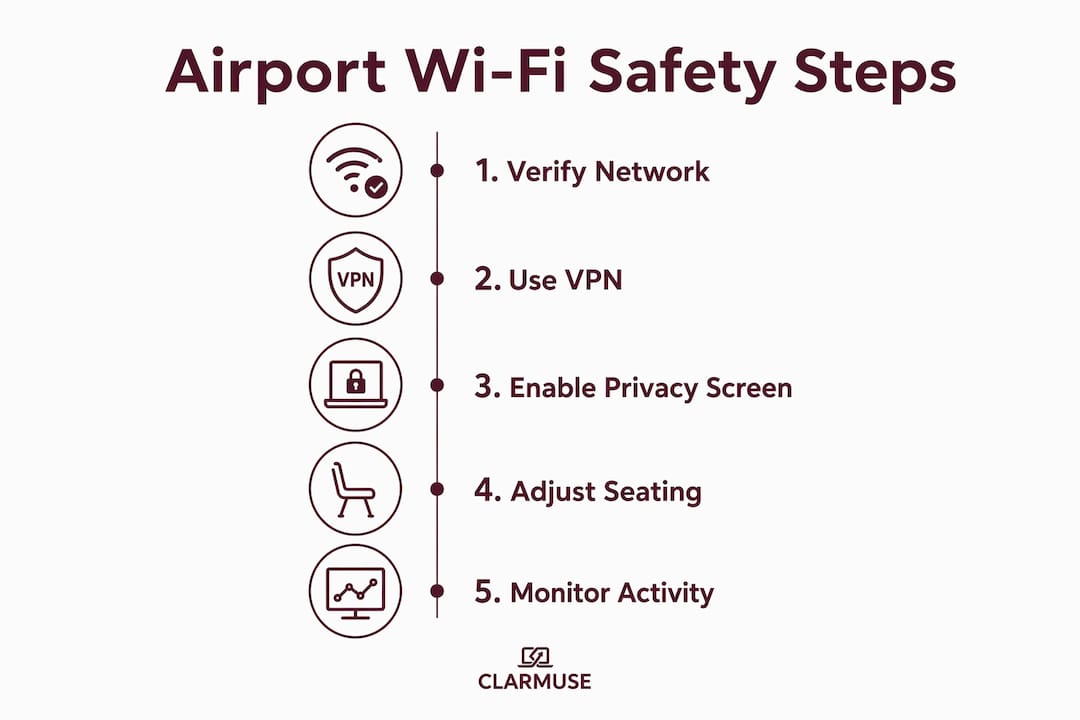
- Network steps to take at the airport before you connect
- Physical screen privacy strategies that work for MacBook users
- How to choose the right MacBook privacy screen for travel
- Installing and using a magnetic privacy screen on your MacBook
- What to do if you suspect your MacBook was compromised at an airport
- Key Takeaways
- A privacy screen is the one thing most travelers skip
- Clarmuse magnetic privacy screens for your MacBook model
- Useful sources
- FAQ
What network threats actually matter on airport Wi-Fi in 2026
Passive eavesdropping, once the dominant airport Wi-Fi risk, has declined sharply as HTTPS adoption has become near-universal. The risk profile has shifted. Active attacks, specifically evil twin access points, SSL-stripping, DNS hijacking, and captive-portal phishing, remain a real concern because they require only inexpensive hardware and a few minutes to deploy in a busy terminal.
Fake access points can present convincing captive portals that request personal credentials or push malicious downloads. Many airports have adopted WPA3 encryption, but adoption is uneven, leaving gaps that sophisticated attackers still exploit. Airports often outsource their Wi-Fi operations entirely, which limits their ability to audit or manage rogue devices on the network.
Practical checks before you connect:
- Verify the exact SSID with airport staff or official signage before joining.
- Watch for login prompts requesting birthdays, email credentials, or payment details. A legitimate airport portal will not ask for any of that.
- Look for HTTPS and a padlock in your browser’s address bar on every page you visit.
- Treat any certificate warning as a hard stop, not a soft suggestion.
Why shoulder surfing is the most underestimated risk for MacBook users
Network defenses have improved. Physical observation has not. Shoulder surfing is one of the most common and underestimated security threats in airport environments, and a VPN does nothing to stop it.
The scenarios where this causes real breaches are specific and common:
- Gate seating: Rows of chairs face the same direction; the person behind you has a direct sightline to your screen.
- Charging zones: You stay stationary for extended periods, often in tight quarters with strangers.
- Food-court tables: Open seating with no natural back-to-wall position available.
- Password entry: Typing credentials in public is a visual exposure event, regardless of whether your connection is encrypted.
A VPN encrypts the data in transit. It cannot prevent someone from reading what is already visible on your display.
Network steps to take at the airport before you connect
- Disable auto-join for open networks in your MacBook’s Wi-Fi settings before you arrive.
- Forget saved airport networks from previous trips so your device does not connect automatically.
- Verify the official SSID with airport staff or posted signage. Attackers rely on lookalike network names that differ by a single character.
- Use your phone’s personal hotspot when possible. TSA and security experts consistently recommend this as the safest alternative to public Wi-Fi.
- Enable your VPN before connecting, not after. A VPN protects traffic from a hostile network operator but does not prevent you from entering credentials on a phishing page.
- Check for HTTPS on every site you visit and stop at any certificate error.
- Use a password manager with auto-fill. It will not fill credentials on a wrong domain, which cuts phishing risk significantly.
Pro Tip: For remote workers who rely on public networks regularly, the cybersecurity guidance for remote workforces from Heights Consulting Group covers layered protection strategies worth reviewing before your next trip.
Physical screen privacy strategies that work for MacBook users
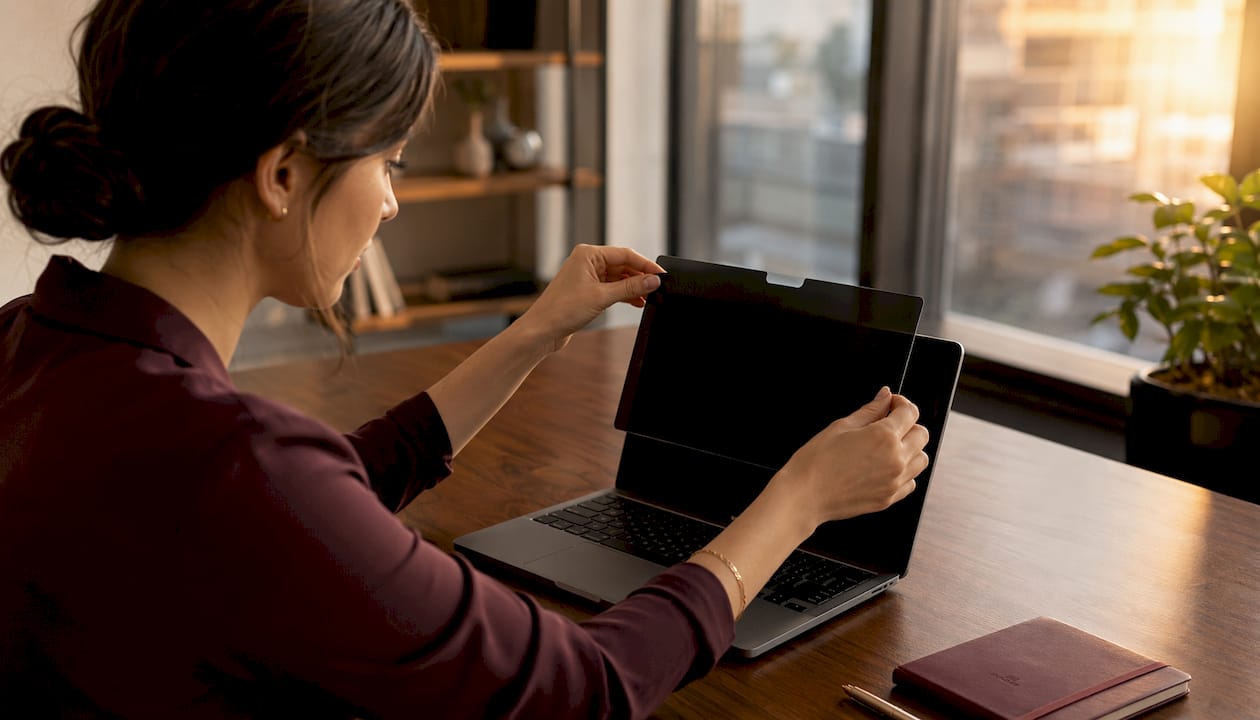
The strongest single defense against visual data exposure is a magnetic privacy screen protector designed specifically for your MacBook model. These filters darken the display at side angles, so someone seated beside or behind you sees a black screen while you see full clarity straight on. Magnetic attachment means you can fit or remove the filter in seconds at the gate.
Positioning tactics add a second layer:
- Sit with your back to a wall or corner whenever seating allows.
- Angle your screen away from open walkways and high-traffic areas.
- Reduce screen brightness in open areas to limit how far your display is visible.
For a practical breakdown of seating and positioning tactics specific to MacBook users, Clarmuse covers this in detail for both airport and in-flight use.
Pro Tip: Combining a back-to-wall seat with a magnetic privacy screen gives you two independent layers of protection. Either one alone reduces risk; both together make casual shoulder surfing essentially impossible.
How to choose the right MacBook privacy screen for travel
Use this checklist before buying:
- Exact model and screen size: Privacy screens must match your MacBook’s dimensions precisely. A filter cut for a 16.2" Pro will not fit a 14.2" Pro correctly.
- Magnetic vs. adhesive attachment: Magnetic is the only practical choice for travel. Adhesive filters are difficult to remove cleanly and cannot be repositioned.
- Viewing-angle reduction: Look for filters that darken the display at roughly 60 degrees or less from center.
- Clarity and color fidelity: Retina-compatible filters preserve sharpness; low-quality filters introduce a visible haze at center.
- Anti-glare coating: Reduces terminal lighting reflections and eye strain during long waits.
- Portability and weight: A thin, lightweight filter that stores in your laptop bag without a separate case is the practical standard for frequent travelers.
- Quick attach/removal: Magnetic filters typically take under 30 seconds to fit or remove, which matters when you are moving between gates.
For travelers who need accurate model fit and fast attach/removal, a magnetic, model-specific filter is the clear choice. Clarmuse designs each filter for a named MacBook model, which eliminates the guesswork on fit and compatibility.
Installing and using a magnetic privacy screen on your MacBook
- Align the filter with your MacBook’s screen edges before engaging the magnets.
- Attach at the top edge first, then press the sides gently until the magnets seat.
- Test the viewing angle by looking from the side to confirm the darkening effect is working.
- Remove by lifting from a corner, not by pulling the full panel at once.
- Store in the included sleeve to avoid scratches when the filter is off.
Maintenance keeps the filter performing correctly:
- Wipe with a dry microfiber cloth. Avoid paper towels, abrasive cloths, or liquid cleaners.
- Store flat or in a protective sleeve, never folded.
- Check the magnet contact points periodically for debris that could scratch the screen.
Pro Tip: Attach the filter before you sit down in a crowded gate area, not after. You will not need to fumble with it while people are already seated around you.
What to do if you suspect your MacBook was compromised at an airport
Act in this order:
- Disconnect from the network immediately. Switch to your phone’s hotspot.
- Lock your device and do not leave it unattended.
- Run a malware scan using your existing security software before doing anything else online.
- Change passwords for critical accounts (email, banking, work) using a trusted device or network, not the airport Wi-Fi.
- Enable or verify two-factor authentication on every account that supports it.
- Contact your bank or IT department if financial or work accounts were active during the session.
Signs that warrant escalation:
- Unexpected account login alerts after your session.
- Browser redirects to unfamiliar pages on a trusted network.
- Applications behaving abnormally or new software appearing without your action.
Reporting to airport staff has limited practical effect. As Aaron Walton notes, airports rarely mediate hacking incidents directly because Wi-Fi operations are typically outsourced. For detailed recovery steps, Clarmuse’s guide on securing sensitive data on a public laptop covers the full triage process.
Key Takeaways
Airport Wi-Fi’s most immediate risk for MacBook users is shoulder surfing, and a magnetic privacy screen is the fastest, most direct defense against it.
| Point | Details |
|---|---|
| Physical threat is primary | Shoulder surfing is common and underestimated; a VPN does not stop it. |
| Verify before you connect | Confirm the official SSID with staff; reject portals requesting personal data. |
| Use a hotspot when possible | A personal mobile hotspot eliminates public Wi-Fi risks entirely for network threats. |
| VPN before connecting | Enable your VPN before joining any airport network, not after. |
| Clarmuse magnetic screens | Model-specific magnetic filters attach in under 30 seconds and block side-angle viewing on MacBook Air and Pro. |
A privacy screen is the one thing most travelers skip
Most airport security advice focuses entirely on network hygiene: use a VPN, check for HTTPS, avoid banking. That advice is correct, but it addresses only half the problem. The person seated one row behind you at the gate does not need to intercept your traffic to read your screen. They just need to look.
Working in airports without a privacy screen is a straightforward exposure. You are typing passwords, opening documents, and handling email in a space designed for high foot traffic and dense seating. The network precautions are worth taking, but they do not change what is visible on your display. A magnetic privacy screen does. It is a small, fast addition to your bag that removes the most common day-to-day risk entirely, without changing how you work or how your screen looks from your own angle. For anyone using a MacBook regularly in shared spaces, it is the practical first step, not an optional extra.
Clarmuse magnetic privacy screens for your MacBook model
Clarmuse makes magnetic privacy screen protectors cut specifically for each MacBook model, so fit is exact and there is no trimming, adhesive, or guesswork involved. Each filter attaches and removes in seconds, which makes it practical for gate use, not just office use.
Current models available:
- MacBook Pro 16.2"
- MacBook Air 15.3"
- MacBook Pro 14.2"
- MacBook Neo 13.0"
- MacBook Air 13.6" (M2, M3, M4, M5 — 2022–2026)
Each filter is designed for Retina displays, includes anti-glare coating, and stores flat in a sleeve that fits in any laptop bag. Browse the full MacBook privacy screen collection to find your model and order directly.
Useful sources
- Shoulder surfing and physical threats: BreachExpress — Airport WiFi Safety in 2026
- Fake hotspots and individual responsibility: CNBC — It’s time to take warnings about airport Wi-Fi seriously
- Captive-portal phishing and WPA3 adoption gaps: Forbes — Why Using Airport Wi-Fi May Be More Dangerous Than Ever
- TSA warnings on public Wi-Fi and hotspot use: Forbes — TSA warns all smartphone users
- Public Wi-Fi encryption and HTTPS: FTC Consumer Advice — Are Public Wi-Fi Networks Safe?
- Airport Wi-Fi verification and safe use: The Seattle Times — Is it safe to use Wi-Fi at the airport?
FAQ
Is airport Wi-Fi safe to use on a MacBook?
Airport Wi-Fi carries real risks, including fake hotspots, captive-portal phishing, and shoulder surfing. For low-risk browsing on an updated device it is generally usable, but financial transactions and sensitive work should go through a VPN or a personal mobile hotspot.
Does a VPN fully protect you on airport Wi-Fi?
A VPN protects your traffic from network-level interception and fake access points, but it does not stop shoulder surfing, phishing pages where you manually enter credentials, or malware already on your device.
What is the fastest way to stop shoulder surfing at an airport?
A magnetic privacy screen protector, like those Clarmuse makes for specific MacBook models, attaches in under 30 seconds and blocks side-angle viewing immediately. Combining it with a back-to-wall seat removes the risk almost entirely.
How do I know if an airport Wi-Fi network is legitimate?
Check the exact SSID against official airport signage or ask staff directly. Reject any login portal that requests personal data such as your birthday, email password, or payment details. A legitimate airport network will not ask for those.
What should I do immediately if I suspect a compromise?
Disconnect from the network, switch to your phone’s hotspot, lock your device, and run a malware scan. Then change passwords for critical accounts and enable two-factor authentication before reconnecting to any network.


