

A MacBook-specific magnetic privacy screen, combined with deliberate seat selection, is the most direct solution for screen privacy in a library. Attach a Clarmuse magnetic filter to your MacBook Air or Pro before you sit down, choose a seat with your back to foot traffic, and you have covered the two highest-impact steps. The American Library Association recognizes screen privacy as a genuine student concern, and FERPA reinforces that student data deserves protection in shared academic spaces. A hardware filter handles what seat choice cannot: the person sitting beside you at a crowded study table.
Table of Contents
- What is a magnetic privacy screen and how does it work?
- How do you choose the right privacy screen for your MacBook?
- How to install and use a magnetic privacy screen on MacBook Air or Pro
- What privacy screens will not stop
- Low-cost privacy hacks when you don’t have a filter
- Why Clarmuse magnetic privacy screens work for MacBook users in libraries
- Clarmuse privacy screens: check your model and order
- Key Takeaways
- The case for getting the fit right
- FAQ
What is a magnetic privacy screen and how does it work?
A magnetic privacy screen is a thin optical filter that attaches to your MacBook display without adhesive. It uses a micro-louver structure, a vertical-blind pattern cut into the filter at the microscopic level, that blocks light traveling at wide angles. The person beside you sees a dark panel. You see a clear image from directly in front.
Macworld’s review of magnetic laptop privacy screens confirms that these filters typically cut viewing angles to roughly thirty degrees per side, and most support reversible finishes: matte on one side, glossy on the other. The trade-off is real. Matte reduces glare and fingerprint visibility, which suits long reading or note-taking sessions. Glossy preserves color fidelity, which matters for design work or photo editing. For most screen privacy study focus tasks in a library, matte is the practical default.
Key technical points:
- Micro-louver filters narrow the visible cone to roughly 60° total (30° left, 30° right of center)
- Magnetic attachment means no residue, no alignment tape, and no adhesive degradation over time
- Reversible finishes let you flip the filter depending on the task
- Thin construction allows most MacBook lids to close with the filter attached
Pro Tip: Use the matte side for reading, research, and writing sessions. Flip to glossy only when color accuracy matters, such as reviewing photos or working in design software.
How do you choose the right privacy screen for your MacBook?
Fit is the first criterion, and it is non-negotiable. A filter cut for a 15-inch generic laptop will not align with a MacBook Air 15.3" notch or camera cutout. Start with your exact model and screen size, then evaluate the remaining dimensions.
Selection checklist:
- Confirm your exact MacBook model and screen size (check System Information or the back of the device)
- Magnetic vs. adhesive attachment (magnetic is removable and leaves no residue)
- Viewing-angle strength (narrower is more private, but verify it suits your ambient light)
- Brightness and color impact (all filters reduce brightness to some degree)
- Thinness and portability (can the lid close safely with the filter on?)
- Case compatibility (some cases block magnetic attachment points)
- Notch and camera cutout alignment
- Price relative to how often you use shared spaces
| Dimension | What to look for |
|---|---|
| Fit / model compatibility | MacBook-specific cut with notch alignment |
| Attachment method | Magnetic preferred; no adhesive residue |
| Privacy strength | Narrower viewing angle = stronger privacy |
| Brightness / color impact | Matte reduces brightness; glossy preserves color |
| Portability | Thin enough to close lid; sleeve included |
| Case compatibility | Verify magnets reach display frame with case on |
| Cleaning & durability | Microfiber-safe; scratch-resistant coating |
| Price | Proportional to daily-use frequency |
When evaluating a filter in person or within a return window, close the lid to check for pressure on the display, open a color-rich image to assess color shift, and confirm the camera cutout aligns before committing.
How to install and use a magnetic privacy screen on MacBook Air or Pro
Installation takes under two minutes. The steps below apply to all Clarmuse magnetic filters across MacBook Air and Pro models.
- Clean the display. Use a dry microfiber cloth to remove dust and fingerprints before attaching the filter. Debris under the filter causes micro-scratches.
- Align the filter from the top edge. Position the top of the filter against the top bezel, centering it left-to-right.
- Verify the camera notch cutout. The filter should clear the FaceTime camera without covering it. Adjust before the magnets fully engage.
- Let the magnets seat. Release the filter and let it snap into place. Do not press hard; the magnets do the work.
- Close-test the lid. Close the MacBook gently. If you feel resistance, the filter may be slightly misaligned or a case is interfering. Reopen and adjust.
- Fine-tune from the front. Reopen and confirm the filter sits flush with no lifted edges.
For hassle-free MacBook travel and daily library use, a few habits extend the filter’s life:
- Remove the filter before color-critical work (video editing, photo grading)
- Carry it in its sleeve or a soft pouch when not attached
- Check for dust accumulation at the edges after each session
Pro Tip: If your MacBook case blocks magnetic attachment, remove the case before attaching the filter. Forcing the filter against a thick case can misalign the magnets and stress the display frame.
What privacy screens will not stop
A magnetic privacy screen narrows the angle at which your display is visible, but it does not make your screen invisible. Someone standing directly behind you, looking over your shoulder at close range, can still read your screen. A person with a camera or phone pointed at your display from any angle can capture what is on it.
Physical awareness remains part of the equation. WIRED’s review of MacBook privacy screens notes that the primary benefit is reduced exposure anxiety and improved comfort in public spaces, not absolute visual security.
Practical mitigations for the gaps a filter cannot cover:
- Set a screen lock or screensaver to activate after 1–2 minutes of inactivity
- Use private browsing when entering passwords or sensitive form data
- Lower screen brightness in very bright environments where the filter’s effect is reduced
- Tilt the screen slightly backward to reduce the rear viewing angle further
- Stay aware of who is directly behind you, especially in open seating areas
Low-cost privacy hacks when you don’t have a filter
These steps work in under 30 seconds and require no hardware.
- Reserve a study carrel or private room. Most university libraries offer bookable quiet rooms; library design research confirms that partitioned spaces and reservable rooms measurably improve perceived privacy.
For a broader look at why library laptop screens attract viewers and which quick mitigations work best, Clarmuse covers the mechanics in detail.
Why Clarmuse magnetic privacy screens work for MacBook users in libraries
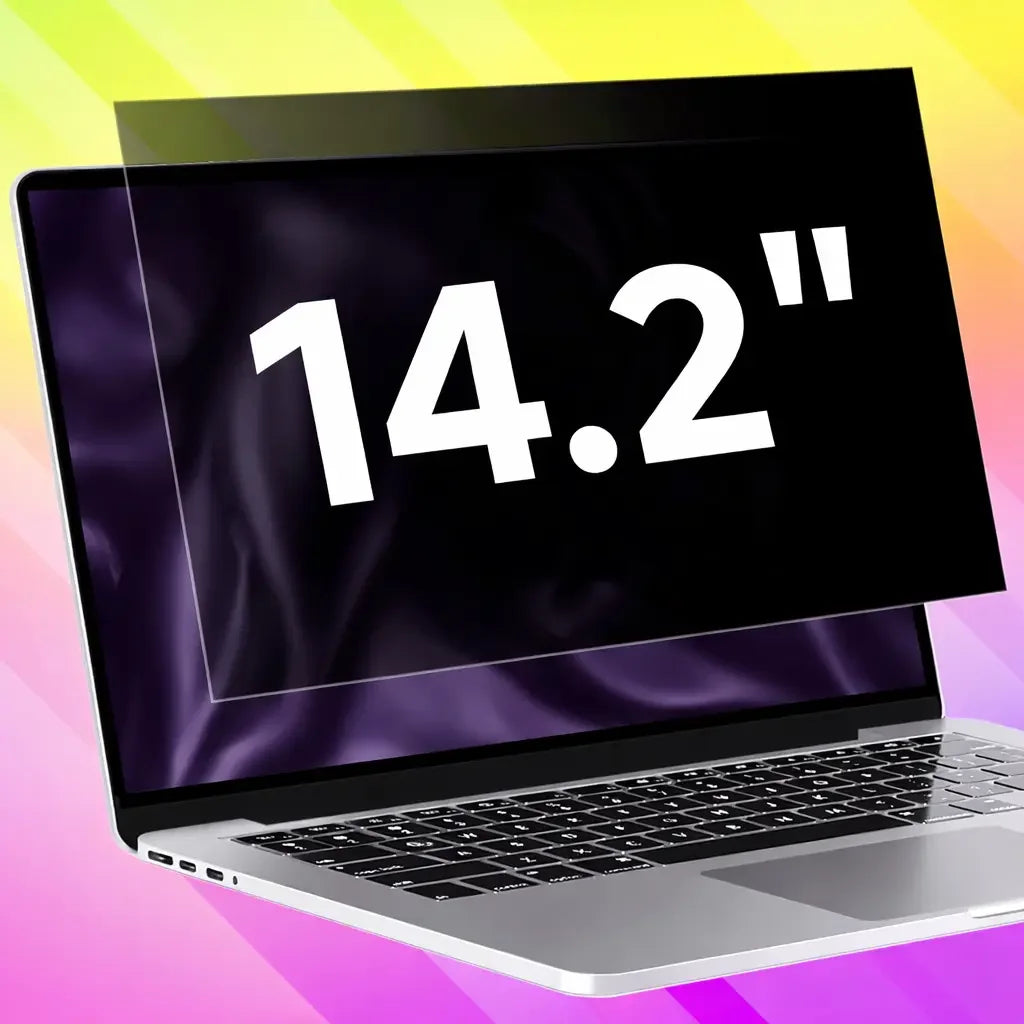
Clarmuse builds magnetic privacy screens specifically for MacBook Air, MacBook Pro, and MacBook Neo models. The fit is model-specific, not generic, which means the notch cutout, camera alignment, and display dimensions match your device exactly. The magnetic attachment system requires no adhesive and leaves no residue. The filter is thin enough that most MacBook lids close safely with it attached, which matters when you move between quiet study areas and open tables throughout the day.
Library privacy guidance from LibraryPrivacyGuides.org recommends pairing privacy screens with thoughtful space selection, and Clarmuse’s portable design makes that pairing practical.
Available models:
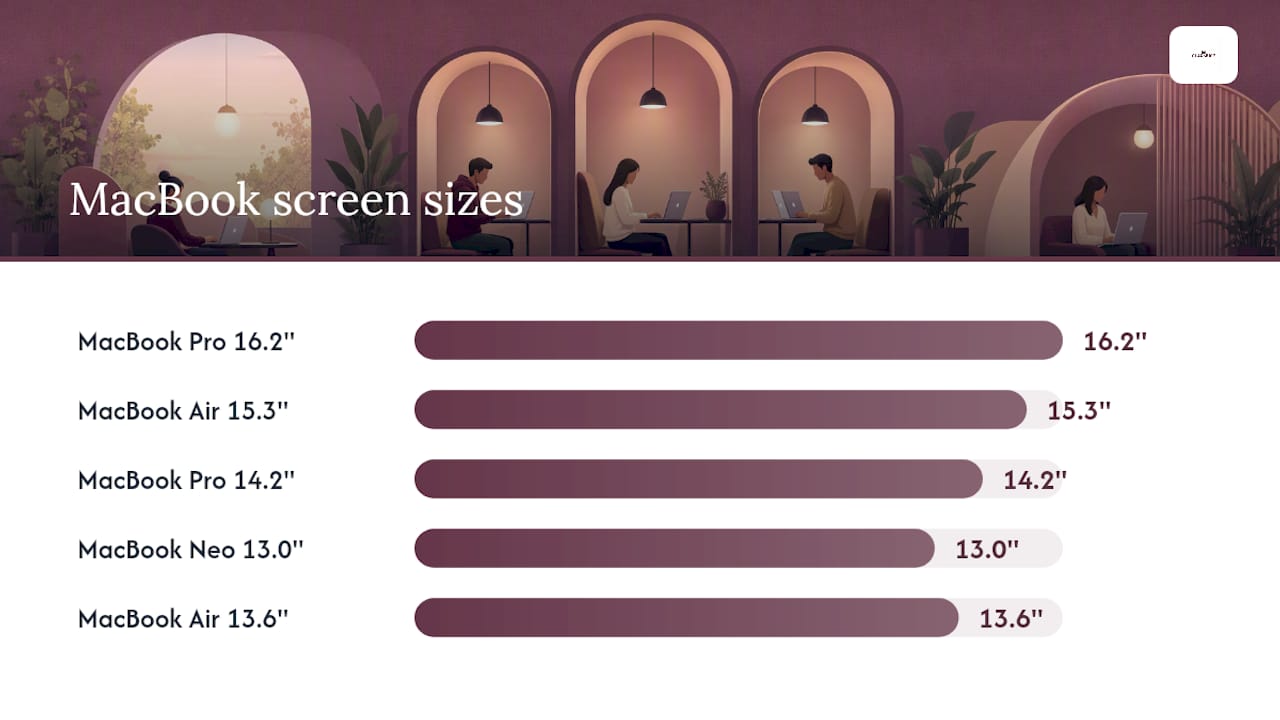
- MacBook Pro 16.2"
- MacBook Air 15.3"
- MacBook Pro 14.2"
- MacBook Neo 13.0"
- MacBook Air 13.6" (M2, M3, M4, M5 — 2022–2026)
To confirm your model, go to Apple menu > About This Mac. Match the screen size listed there to the corresponding Clarmuse SKU above.
| MacBook model | Screen size | Attachment | Case-compatible |
|---|---|---|---|
| MacBook Pro | 16.2" | Magnetic | Check case thickness |
| MacBook Air | 15.3" | Magnetic | Check case thickness |
| MacBook Pro | 14.2" | Magnetic | Check case thickness |
| MacBook Neo | 13.0" | Magnetic | Check case thickness |
| MacBook Air (M2–M5) | 13.6" | Magnetic | Check case thickness |
Author: Gabriel, Clarmuse
Clarmuse privacy screens: check your model and order
Clarmuse magnetic privacy screens give MacBook Air and Pro users a model-specific fit that generic filters cannot match. The notch aligns, the magnets seat cleanly, and the filter travels flat in its sleeve without adding bulk to your bag. Before ordering, confirm your exact screen size in About This Mac and cross-reference it with the model list above. If you use a protective case, verify that the case does not block the display-frame magnets before checkout.
Browse the full MacBook privacy screen collection or go directly to your model’s product page to check fit details and place your order.
Key Takeaways
A MacBook-specific magnetic privacy screen paired with a smart seat choice covers the two highest-impact steps for screen privacy in any shared study space.
| Point | Details |
|---|---|
| Use a model-specific filter | Generic filters miss the notch; match your exact MacBook screen size before buying. |
| Sit with your back to a wall | Eliminating rear and side sightlines reduces exposure before the filter even engages. |
| Install in six steps | Clean display, align top edge, verify camera cutout, let magnets seat, close-test, fine-tune. |
| Know the limits | Filters block side angles; they do not stop someone directly behind you or a camera capture. |
| Clarmuse covers five models | MacBook Pro 16.2", Air 15.3", Pro 14.2", Neo 13.0", and Air 13.6" (M2–M5 2022–2026). |
The case for getting the fit right
The most common mistake with privacy screens is treating fit as a secondary concern. A filter that does not align with the MacBook’s notch leaves the camera partially covered or the top edge lifted, which creates a gap that defeats the lateral blocking entirely. Model-specific design is not a marketing distinction; it is the functional prerequisite.
There is also a subtler point worth making. The psychological benefit of a privacy screen, the reduction in background awareness of who might be looking, is well-documented. WIRED’s coverage of MacBook privacy screens describes this as reduced exposure anxiety that translates directly into better focus. That benefit disappears if the filter fits poorly and you spend the session adjusting it. Precision fit is what makes the product work as intended, not just optically but practically.
Clarmuse’s focus on MacBook-specific magnetic filters reflects that logic. The product exists because a correctly fitted, magnetically attached filter requires no adjustment once it is on. You attach it, sit down, and work.
FAQ
What does a magnetic privacy screen actually block?
A magnetic privacy screen blocks side-angle viewing by narrowing the visible cone to roughly 30° per side of center. Someone seated beside you sees a dark screen; you see a clear image from directly in front.
Will a privacy filter work with my MacBook case on?
It depends on the case. Thick or raised-edge cases can prevent the filter’s magnets from reaching the display frame. Remove the case or verify magnet clearance before attaching.
How do I find my exact MacBook screen size?
Go to Apple menu > About This Mac. The display size is listed there. Match it to the corresponding Clarmuse model SKU to confirm fit before ordering.
Do privacy screens reduce screen brightness?
Yes. All micro-louver filters reduce brightness to some degree. Adjust your MacBook’s display brightness upward slightly after attaching the filter to compensate.
Are Clarmuse privacy screens reusable?
Yes. The magnetic attachment system means you can remove and reattach the filter without adhesive or residue. Store it flat in its sleeve between sessions to preserve the coating.


