

Apply a magnetic privacy filter, position your back to the wall, and set auto-lock to 30–60 seconds. Those three steps block screen visibility in study groups faster than any other combination, and you can complete all of them in under two minutes.
Right now, do these four things:
- Attach a magnetic privacy screen to your MacBook (available for MacBook Air 13.6", 15.3", MacBook Pro 14.2", 16.2", and MacBook Neo 13.0")
- Move to a seat with your back to the nearest wall or corner
- Reduce display brightness to the lowest comfortable level
- Set auto-lock to 30–60 seconds under System Settings → Lock Screen.
Cost: magnetic privacy filters for MacBook models typically vary depending on screen size and material quality. Setup time from unboxing to installation and testing: under five minutes. For screen privacy in study settings, the combination of a physical filter and seating adjustment gives you the most immediate reduction in side-angle exposure.
Table of Contents
- How do privacy screen filters actually work?
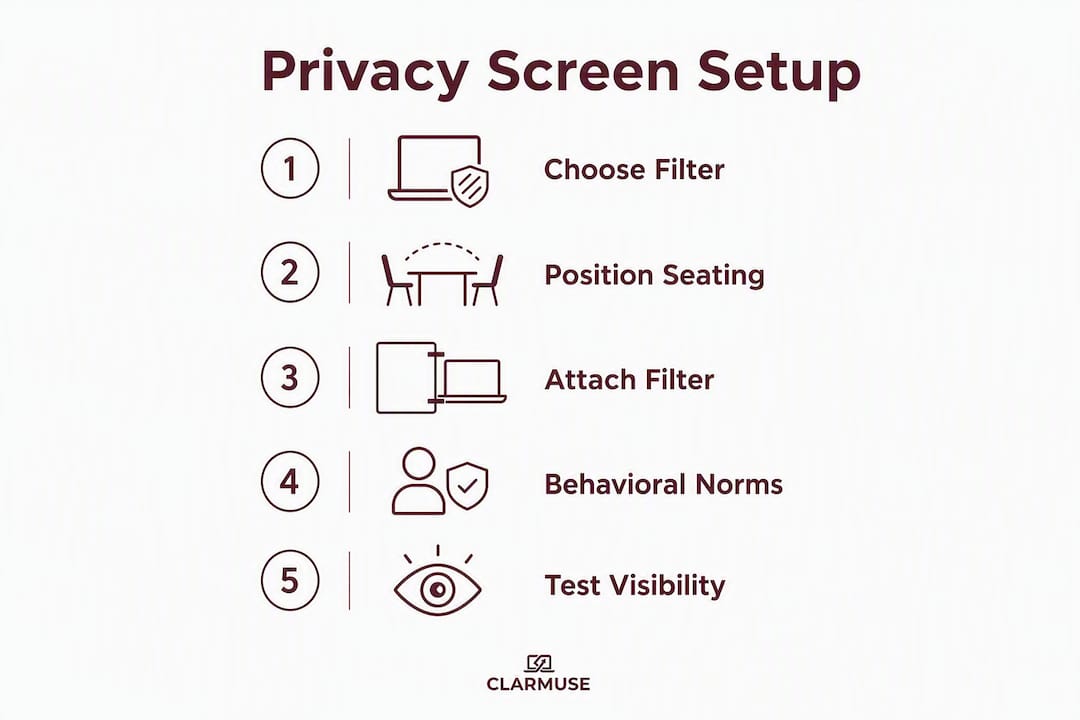
- Step-by-step setup and seating for shared study spaces
- Software and behavioral changes that complement a privacy screen
- How do you choose the right privacy screen for your MacBook?
- What does a privacy screen cost, and how long does setup take?
- Key Takeaways
- The part most people skip
- Clarmuse magnetic privacy screens for MacBook users
- Useful sources
- FAQ
How do privacy screen filters actually work?
Privacy filters use microlouver technology: tiny vertical slats embedded in the filter material that allow light to pass straight through at head-on angles but block it at side angles. Anyone seated more than roughly 30–45 degrees off-center sees a dark or heavily blurred screen. The effect is similar to looking at window blinds from the side versus straight on.
The trade-off is real. Filters reduce peak brightness, typically by 30–50%, and can introduce a slight color shift at the edges of the head-on viewing cone. For most study and office environments, that cost is acceptable. For color-critical design work, it is worth noting before you buy.
What privacy filters do not stop:
- Direct front-view observation from someone seated directly across from you
- A camera positioned at head-on angle (phone camera, webcam)
- Software-based screen capture, remote access tools, or malware — physical filters have no effect on these
- Reflection-based viewing in high-gloss environments (bright windows behind you can partially offset the filter)
Filters are most effective in side-lit or overhead-lit rooms where the primary risk is shoulder surfing from adjacent seats. They are least effective when someone is seated directly across a narrow table with a clear line of sight to your screen.
Step-by-step setup and seating for shared study spaces
Getting the most from a privacy filter requires both correct installation and deliberate seating choices. Follow these steps in order.
- Clean your MacBook screen with a dry microfiber cloth before attaching any filter. Dust or smudges under the filter create visible artifacts.
- Align the filter to the screen edges. For magnetic Clarmuse filters, hold the filter near the lid’s metal perimeter and let the magnets guide it into position. The fit is model-specific, so edge-to-edge alignment is automatic when you have the correct size.
- Test the viewing angle by sitting in your normal position, then asking a colleague to walk to a 45-degree side angle. The screen should appear dark or unreadable from that position.
- Adjust brightness and contrast after the filter is on. Because the filter reduces brightness, you may need to increase display brightness slightly to maintain comfortable reading for yourself.
- Confirm auto-lock is active before your session starts.
For seating, position your back against a wall or corner so no one can approach from behind. At a rectangular table, take an end seat rather than a middle one. At a round or hexagonal table, choose the seat farthest from foot traffic. If you are at an L-shaped desk arrangement, orient your screen toward the interior corner so both open sides face away from neighbors.
Pro Tip: When a study partner needs to see your screen briefly, detach the magnetic filter in one motion, collaborate, then reattach. The magnetic mechanism makes this a three-second routine rather than a disruption. Trying to angle a non-removable filter for collaboration is awkward; the detach-reattach approach keeps the session moving.

Before each session, do a quick 10-second test: tilt your screen to its normal working angle and glance from the side. If you can read text clearly from 45 degrees, the filter may be misaligned or the wrong size for your model.
Software and behavioral changes that complement a privacy screen
A physical filter handles side-angle viewing. Software settings reduce the remaining exposure vectors and help you stay focused during group study.
Device settings to configure now:
- Reduce brightness to the lowest comfortable level. A dimmer screen is harder to read from any angle, filter or not.
- Enable dark mode (System Settings → Appearance → Dark). Dark backgrounds reduce the contrast that makes text readable at a distance.
- Set auto-lock to 30–60 seconds. That specific range is short enough to protect an unattended screen but long enough not to interrupt active work. Anything over two minutes leaves your screen exposed during a bathroom break.
- Disable lock-screen notifications so message previews do not flash on screen when the device locks.
- Enable Focus or Do Not Disturb to suppress notification banners that could reveal app names, sender names, or message content.
Behavioral habits matter as much as settings. Keep your laptop close to the table edge nearest you rather than pushed to the center where more people have a direct angle. Use private browsing when researching anything sensitive. When you step away, close the lid rather than just locking the screen.
Study groups also benefit from simple verbal norms. Agreeing at the start of a session that no one looks at another person’s screen without permission reduces accidental exposure and the social awkwardness of asking someone to look away. Research on group-based visual-permission systems confirms that explicit group norms reduce privacy risk in shared sensing environments, and the same principle applies in physical study spaces.

Software adjustments reduce visibility cues but cannot physically stop side-angle viewing. Pair them with a filter for full coverage.
How do you choose the right privacy screen for your MacBook?
Matching the filter to your exact screen size is the single most important buying decision. A filter cut for a 15-inch generic laptop will leave light-leaking gaps on a MacBook Air 15.3" because Apple’s edge-to-edge displays extend closer to the bezel than most Windows laptops. For modern MacBooks, exact sizing to the tenth of an inch prevents that leakage and eliminates ghosting at the edges.
| Dimension | What to look for | Why it matters |
|---|---|---|
| Fit by MacBook model/screen size | Model-specific sizing (e.g., 16.2", 15.3", 14.2", 13.6", 13.0") | Edge-to-edge displays require precise fit to prevent light leakage |
| Attachment method | Magnetic vs. adhesive vs. clip | Magnetic allows daily attach/detach; adhesive is permanent; clip can shift |
| Privacy angle/effectiveness | Viewing angle narrowed to ±30–45° | Narrower angle = stronger privacy in crowded spaces |
| Clarity/anti-glare | Anti-glare coating, minimal color shift | Affects readability for long study sessions |
| Portability/thickness | Thin, flat profile | Easier to carry and store without warping |
| Price/value | $30–$80 for quality magnetic filters | Higher price typically reflects magnetic mechanism and material quality |
Why magnetic attachment is the right choice for MacBooks. Adhesive filters bond permanently and leave residue when removed. Clip-on filters can shift during transport and may scratch the display bezel. Magnetic filters align to the MacBook lid’s metal perimeter, detach cleanly, and can be reattached dozens of times without degrading. For students and professionals who move between locations daily, that repeatability is the practical advantage.
To confirm your MacBook model quickly: click the Apple menu → About This Mac. The model name and year appear on the first line. Match that to the filter’s listed compatibility before purchasing.
Clarmuse magnetic privacy screens are built for specific MacBook models, including the MacBook Pro 16.2", MacBook Air 15.3", MacBook Pro 14.2", MacBook Neo 13.0", and MacBook Air 13.6" (M2, M3, M4, M5, 2022–2026). For a student-focused model comparison, the Air 13.6" and Air 15.3" filters are the most commonly purchased for campus and library use.
What does a privacy screen cost, and how long does setup take?
Price and setup time are straightforward. The main variables are attachment method and material quality.
Price ranges for MacBook-compatible privacy filters:
- Entry-level ($30–$45): Adhesive or clip-on filters, generic sizing, basic microlouver material. Functional but less precise fit and no easy removal.
- Mid-range ($45–$65): Magnetic attachment, model-specific sizing, anti-glare coating. The practical choice for daily use.
- Premium ($65–$80+): Magnetic attachment, thinner profile, higher optical clarity, minimal brightness loss. Worth the cost for professionals who work on screens for six or more hours daily.
What drives price upward: the magnetic mechanism itself adds manufacturing cost, model-specific tooling requires separate production runs for each MacBook size, and higher-grade filter material reduces the brightness penalty.
Setup time: Out of box to installed and tested takes under five minutes for a magnetic filter. Daily attach time is under 10 seconds once you know the alignment. Detach is one motion.
Durability and care. Clean the filter with a soft microfiber cloth or isopropyl wipes designed for screens, and store removable magnetic filters flat to prevent warping. Handled correctly, a quality filter lasts one to two academic years before the microlouver material shows visible wear. That puts the cost-per-day well under $0.15 for a mid-range filter used daily.
Key Takeaways
A magnetic privacy filter matched to your MacBook model, combined with wall-facing seating and a 30–60 second auto-lock, gives you the fastest and most complete reduction in screen visibility during study group sessions.
| Point | Details |
|---|---|
| Apply a privacy filter first | Microlouver filters block side-angle views at ±30–45°; no other single step matches that coverage. |
| Seat with your back to the wall | Positioning against a wall or corner eliminates rear and side approach angles at no cost. |
| Set auto-lock to 30–60 seconds | That range protects an unattended screen without interrupting active work. |
| Match filter to your exact MacBook model | Edge-to-edge displays require model-specific sizing to prevent light leakage at the bezel. |
| Clarmuse magnetic filters | Available for MacBook Air 13.6", 15.3", Pro 14.2", 16.2", and Neo 13.0" with magnetic attach/detach. |
The part most people skip
Most guides on study group screen privacy stop at “buy a privacy filter.” That is the right starting point, but the decision that actually determines whether you use it every day is the attachment method, not the filter itself.
A filter that requires careful adhesive alignment or a clip that shifts in your bag gets left at home. The friction of setup is what kills adoption. Academic research on revealing versus hiding needs in virtual study rooms shows that students do not want an all-or-nothing privacy solution. They want to share their screen for collaboration and protect it for focused work, sometimes within the same session. A magnetic filter that detaches in one motion and reattaches in three seconds fits that pattern. An adhesive filter does not.
The second overlooked point: seating matters more than most people expect. A privacy filter narrows your viewing cone to roughly ±30–45 degrees. At a standard library table, that covers most adjacent seats. But at a round café table where someone sits directly across from you at 0 degrees, the filter does nothing. Knowing the geometry of your usual study space lets you decide whether a filter alone is sufficient or whether you also need to reposition. For lecture hall and classroom contexts, the person directly behind you is often the bigger risk than the person beside you, which is why combining a filter with a slight backward screen tilt is more effective than either alone.
The practical takeaway: choose a filter you will actually use every day, not the one with the most impressive spec sheet.
Clarmuse magnetic privacy screens for MacBook users
Every MacBook model in Apple’s current lineup has a different screen size, and generic filters leave visible gaps on edge-to-edge displays. Clarmuse builds magnetic privacy screens sized to the exact dimensions of each MacBook model, so the filter covers the full display without light leakage at the bezel.
The magnetic attachment means you can go from protected to collaborative and back in seconds, which is the workflow that actually fits a study group. No adhesive residue, no clip marks on the bezel, no recalibration after transport.
Clarmuse filters are available for the MacBook Air 13.6" (M2, M3, M4, M5, 2022–2026), MacBook Air 15.3", MacBook Pro 14.2", MacBook Pro 16.2", and MacBook Neo 13.0". Confirm your model under Apple menu → About This Mac, then select the matching filter. Setup takes under five minutes.
Useful sources
- Use a Privacy Filter Screen — Consumer Reports Security Planner: guidance on selecting the right filter size and privacy angle for your environment.
- “I Want to Reveal, but I Also Want to Hide” — ACM CSCW: academic study on privacy and presence trade-offs in virtual study rooms; relevant to understanding why configurable privacy tools fit study-group workflows.
- VisGuardian: Group-based Privacy Control for Front Camera Data — arXiv: research on group norms and automatic detection as complements to physical privacy measures.
- Screen Privacy for Studying: Focus and Security Benefits — Clarmuse: study-specific guidance on combining physical and software privacy for campus and classroom use.
- Internet Privacy Tools Comparison Checklist 2026 — TechStackToday: broader checklist for combining hardware and software privacy tools.
FAQ
How do you make your screen less visible to others?
Apply a microlouver privacy filter to narrow the viewing angle to roughly ±30–45 degrees, position your back to a wall, and reduce screen brightness. Those three steps together give the most immediate reduction in screen visibility.
Is there a screen protector where others cannot see?
Yes. Privacy screen filters use microlouver technology to block side-angle views, making the screen appear dark or blank to anyone seated more than 30–45 degrees off-center. Clarmuse makes magnetic versions sized for specific MacBook models, including the Air 13.6", Air 15.3", Pro 14.2", Pro 16.2", and Neo 13.0".
How do you block screen monitoring in a study group?
A physical privacy filter stops visual shoulder surfing. For software-based monitoring or screen capture, use a 30–60 second auto-lock, disable lock-screen notifications, and avoid leaving sessions open when you step away. Physical and software protections address different threat types and work best together.
How do you prevent others from seeing your laptop screen?
Combine a model-specific privacy filter with wall-facing seating and dark mode enabled. At a shared table, take an end or corner seat to minimize the number of people with a direct viewing angle. For MacBook users, magnetic filters allow quick removal when you need to share your screen with a study partner.
How often should you clean a privacy screen filter?
Wipe the filter with a soft microfiber cloth or isopropyl wipes designed for screens after each use. Store removable magnetic filters flat to prevent warping. Regular cleaning maintains optical clarity and extends filter life through a full academic year or longer.


