

Use a privacy screen at any hot desk where others sit within arm’s reach, and treat every departure — even a 30-second coffee refill — as a full checkout. That is the core of screen privacy hot desk etiquette explained in one rule. A 2025 field study confirmed that shoulder surfing in shared environments happens as a byproduct of physical proximity, not deliberate snooping. You do not need a bad actor nearby. You need only a neighbor with a clear sightline.
Three immediate actions before you open a single document:
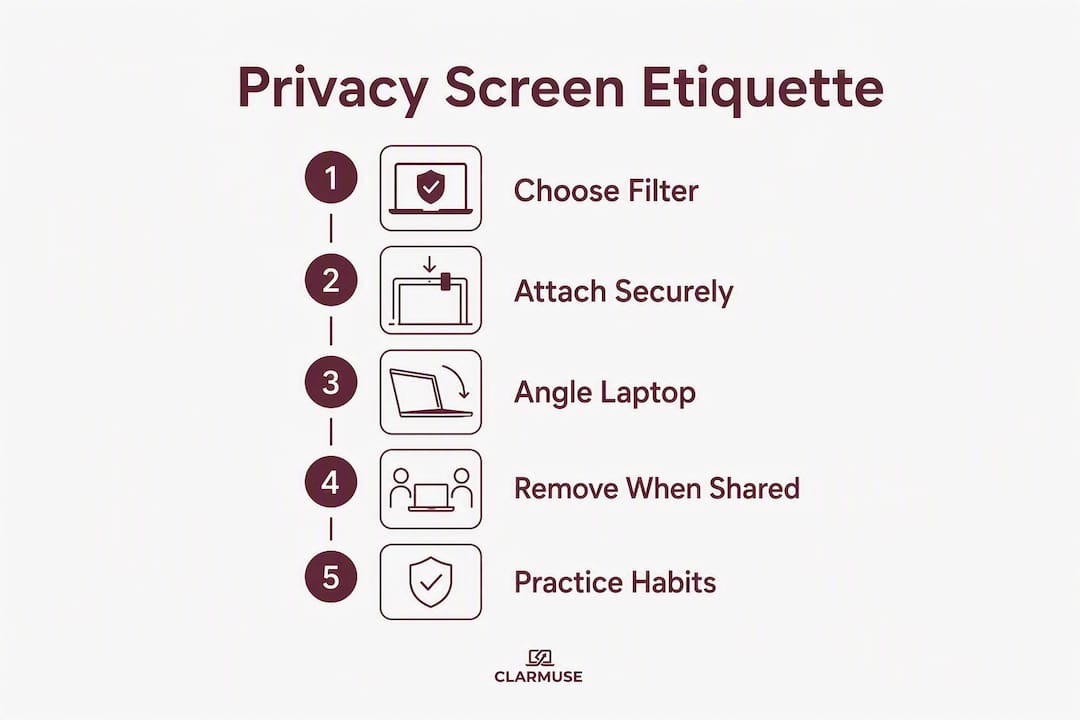
- Attach your magnetic privacy filter before sitting down, not after you have already opened your inbox.
- Choose a seat with your back to a wall or a solid partition whenever the layout allows.
- Set a screen lock shortcut (Command + Control + Q on macOS) and use it every time you stand up.
Pro Tip: Clarmuse magnetic filters are sized to specific MacBook models — MacBook Pro 16.2", MacBook Pro 14.2", MacBook Air 15.3", MacBook Air 13.6" (M2–M5, 2022–2026), and MacBook Neo 13.0" — so the fit is precise and the magnets hold without adjustment.
Table of Contents
- When does a privacy screen actually make sense at a hot desk?
- Do’s and don’ts for using a privacy filter around colleagues
- How to fit, attach, remove, and care for a magnetic MacBook privacy screen
- What security habits should accompany a privacy screen?
- Hot-desk privacy checklist for MacBook users
- Key Takeaways
- Why design and behavior belong together
- Clarmuse magnetic privacy filters for your MacBook model
- FAQ
- Useful sources
When does a privacy screen actually make sense at a hot desk?
High-risk settings justify a filter every time: crowded coworking rows, side-by-side desks separated by less than three feet, seats near a walkway or printer station, airport gate areas, and café tables with open sightlines on two or more sides. If you are reviewing contracts, payroll data, medical records, or banking screens, the threshold drops further. Task sensitivity matters as much as physical crowding.
Visual hacking is consistently underestimated in open workspaces. Prevention through physical filters and seating choice is more effective than any remediation after the fact.
Low-risk situations where a filter is optional: a private office with a closed door, a home desk with no shared sightlines, or an isolated corner booth with no adjacent seating. Screen brightness also changes the equation. A very bright display is readable from a greater distance, so reducing brightness in a crowded space cuts visibility even before a filter is attached. Seating choice and brightness settings together materially reduce how far away a passerby can read your screen.
Pro Tip: If you cannot get a wall seat, angle your MacBook so the open side faces a partition or a window rather than foot traffic.
Do’s and don’ts for using a privacy filter around colleagues
Do:
- Attach the filter before opening any sensitive document, not mid-session.
- Angle your screen slightly downward so the viewing cone points toward you, not upward toward standing passersby.
- Use headphones for calls. Speaking client names, account numbers, or passwords aloud in an open space is a separate privacy risk the filter cannot address.
- Wipe the desk surface and pick up all items before you leave. Clean-desk rules — arrive light, leave with everything you brought — are a security policy, not a preference.
Don’t:
- Leave the filter attached to a shared monitor or display that others need to use. A privacy filter on a communal screen blocks everyone.
- Treat the filter as a substitute for locking your screen. A filter narrows the viewing angle; it does not prevent someone from reading your screen head-on if you walk away.
- Leave printed documents, sticky notes with credentials, or USB drives on the desk. The filter protects what is on screen. It does not protect what is on the desk.
Pro Tip: The most common security failure at a hot desk is the grab-and-go moment: a quick departure where the screen stays unlocked and a document stays open. Lock first, then move.
When a meeting requires a shared display, remove the filter cleanly before connecting to the room screen. If you need a different seat for privacy reasons, a direct, low-key ask to a desk neighbor or a space coordinator is standard practice in most coworking environments.
How to fit, attach, remove, and care for a magnetic MacBook privacy screen
Magnetic filters for MacBook models attach along the display bezel using precisely placed magnets. Incorrect model fit causes edge lift, poor adhesion, and reduced side-angle blackout. Match the filter to your exact MacBook model before purchasing.
Attachment steps:
- Clean the display edge with a dry microfiber cloth to remove dust and oils.
- Hold the filter by its edges and align the top edge with the MacBook display frame.
- Let the magnets draw the filter into place. Do not press hard. If it does not seat evenly, lift and realign.
- Check the viewing angle from a 45-degree side position to confirm the blackout is working.
Removal and storage: Lift from one corner, peel gently along the edge, and store flat in a sleeve or the original packaging. Never fold or stack the filter under heavy objects. For travel, keep it in a flat pocket of your bag away from keys or metal items that could scratch the surface.
Model compatibility reference:
| MacBook Model | Screen Size | Clarmuse Filter |
|---|---|---|
| MacBook Pro 16.2" | 16.2" | MacBook Pro 16.2" filter |
| MacBook Air 15.3" | 15.3" | MacBook Air 15.3" filter |
| MacBook Pro 16.2" | 14.2" | MacBook Pro 14.2" filter |
| MacBook Neo | 13.0" | MacBook Neo 13.0" filter |
| MacBook Air M2–M5 (2022–2026) | 13.6" | MacBook Air 13.6" filter |
Microlouver technology inside the filter blocks light at oblique angles so you see the display clearly while side viewers see a darkened panel. One trade-off: the filter reduces overall brightness slightly. Raise your MacBook’s display brightness one or two steps after attaching to compensate without overdriving the backlight.
What security habits should accompany a privacy screen?
A filter handles the physical sightline. Digital habits handle everything else. For secure screen sharing and safe hot-desk sessions, apply these settings before you sit down in a shared space:
- Set screen auto-lock to 30 seconds or 1 minute in System Settings > Lock Screen.
- Disable lock-screen notifications so message previews do not appear on a locked display.
- Use a password manager rather than typing credentials in plain view.
- Enable MFA on all accounts you access in public. The Zero Trust model for hot desking treats every session and every surrounding as untrusted by default.
Physical habits matter equally. Never leave printed pages at the desk. Pick up USB drives. Treat a two-minute absence the same as a full departure: lock the screen, close sensitive tabs, and take your bag.
One often-overlooked point: hot-desk booking platforms generate timestamped records of where you sit, creating location data that organizations may use for space planning. Be aware of what your desk reservation reveals about your schedule and patterns.
Because the U.S. lacks a single comprehensive federal employee data-privacy law, a self-reliant Zero Trust mindset is the practical standard for shared-workspace behavior. Do not assume the network, the surroundings, or the booking system is private.
Hot-desk privacy checklist for MacBook users
On arrival:
- [ ] Choose a seat with your back to a wall or partition.
- [ ] Attach your Clarmuse magnetic filter before opening any files.
- [ ] Set screen brightness to a comfortable level (not maximum).
- [ ] Connect to a trusted VPN before joining any network.
- [ ] Confirm auto-lock is set to 30 seconds–1 minute.
During your session:
- [ ] Use Command + Control + Q to lock the screen any time you step away.
- [ ] Use headphones for calls; move to a private room for sensitive conversations.
- [ ] Close unnecessary browser tabs before video calls to hide bookmarks and notifications.
- [ ] Keep your bag and printed materials with you or secured.
On departure:
- [ ] Lock or shut down your MacBook fully.
- [ ] Remove the magnetic filter and store it flat.
- [ ] Pick up all items: cables, USB drives, printed pages, notebooks.
- [ ] Wipe the desk surface per the space’s hot-desk etiquette guidelines.
Check your MacBook model size and generation, then choose the matching Clarmuse filter from the MacBook privacy screen collection before your next shared-space session.
Key Takeaways
A privacy screen reduces side-angle visibility, but only clean-desk habits, auto-lock settings, and a Zero Trust mindset complete the protection at a shared desk.
| Use a filter in high-risk settings | Crowded rows, side-by-side desks, airport gates, and cafés all justify attaching a filter before opening files. | (general examples without numeric details) | Match the filter to your MacBook model | Incorrect model fit causes edge lift and reduced blackout; Clarmuse offers model-specific filters for five MacBook sizes. | | Treat every departure as a checkout | Lock the screen, remove the filter, and take all items — even for a 30-second absence. | | Pair physical and digital controls | Auto-lock at 30 seconds–1 minute, disabled lock-screen notifications, and MFA work alongside the filter. | | Clarmuse magnetic filters | Available for MacBook Pro 16.2", Pro 14.2", Air 15.3", Air 13.6" (M2–M5), and Neo 13.0" with precise magnetic fit. |
Why design and behavior belong together
The conventional framing around privacy screens focuses almost entirely on the product. Buy a filter, attach it, done. That framing misses the larger point.
A filter narrows the viewing angle. It does not lock your screen when you walk away. It does not stop a colleague from reading an open document over your shoulder during a meeting. It does not prevent a booking system from logging your location. The physical object is one layer in a stack that only works when the behavioral layers are also in place.
Clarmuse designs magnetic filters to be thin, low-profile, and fast to attach or remove precisely because the filter needs to fit into a real workflow. A filter that takes two minutes to align will get left in a bag. One that snaps on in seconds gets used consistently. The design trade-off between view clarity for the user and side-angle blackout is real: a narrower blackout angle means better privacy but slightly reduced brightness for the user. Raising display brightness one step after attaching the filter resolves that in most indoor environments.
The etiquette side of open-office privacy is equally practical. A filter on a shared display blocks everyone. A filter left on a desk becomes someone else’s problem. The behavioral rules in this guide exist because the product works best when the person using it also works deliberately.
Clarmuse magnetic privacy filters for your MacBook model
Clarmuse makes magnetic privacy screen protectors sized to specific MacBook models. Each filter attaches without adhesive, sits flush with the display bezel, and removes in seconds for meetings or travel. The thin profile adds no meaningful weight to a travel bag.
To choose the right filter: check your MacBook model name and screen size in System Settings > About This Mac, then match it to the Clarmuse product page. The MacBook Pro 16.2" filter fits the current Pro lineup; the MacBook Air 13.6" filter covers M2 through M5 models from 2022 to 2026. Models for the Pro 14.2", Air 15.3", and Neo 13.0" are also available. Browse the full MacBook Pro magnetic filter collection to compare options and confirm your model match before ordering.
FAQ
Does a privacy screen replace locking your MacBook at a hot desk?
No. A privacy filter narrows the side-angle viewing cone but does not prevent someone from reading your screen head-on if you step away. Always lock your screen with Command + Control + Q before leaving your seat.
How do I know which Clarmuse filter fits my MacBook?
Check your model name and screen size in System Settings > About This Mac, then match it to the Clarmuse product page for that size. Filters are available for MacBook Pro 16.2", Pro 14.2", Air 15.3", Air 13.6" (M2–M5, 2022–2026), and Neo 13.0".
Will a privacy filter make my MacBook screen noticeably darker?
Yes, slightly. Microlouver filters reduce overall brightness as a side effect of blocking oblique light. Raising display brightness one or two steps after attaching the filter compensates in most indoor environments.
What is the Zero Trust approach to hot-desk security?
The Zero Trust model treats every shared session and surrounding as untrusted by default. Practical controls include auto-lock after 30 seconds to 1 minute and enforcing MFA on all accounts accessed in public.
Should I remove my privacy filter for shared meeting screens?
Yes. A privacy filter on a display others need to view blocks their sightline. Remove the filter before connecting to a room screen or turning your MacBook toward a colleague.
Useful sources
Visual hacking and shoulder surfing:
- How to Protect Your Privacy When Using Coworking Spaces — PrivacyOn — 2025 field study on shoulder surfing in shared environments.
- How to Protect Your Screen Privacy — Archypedia News — microlouver technology, brightness adjustments, and seating guidance.
Hot-desk policy and etiquette:
- Hot Desk Etiquette Guide — Skedda — clean-desk rules and shared-space behavioral standards.
- Hot Desk Guidelines: Booking, Hygiene, and Privacy Rules — LegalClarity — booking-system data and location-record privacy implications.
- Hot Desk Best Practices for 2026 — Joe Apps Technology Support — Zero Trust model, session auto-lock, and MFA guidance.
Clarmuse blog posts:
- Privacy Screens in Coworking Spaces: Your 2026 Guide
- Why Client Data Needs Screen Protection at Work
- Desk Privacy Solutions for MacBook Users in Open Workplaces


